
This Website Process is Sure to Help You Build a Winning Website!
You’ve decided to build your own website. Congratulations! This is something I think everyone should do in their lifetime as it challenges you in ways not many other projects can. It touches on creativity, engineering, craftsmanship and artistry in its own unique way. The creating a website process involves many steps but once you get rolling it can be pretty seamless. This builds on what is taught in our previous articles in the series. If you’re pretty new to this whole internet and website thing, I suggest taking a look at the previous articles if you haven’t already.
RELATED:
Understanding the Internet: Starting with The Difference Between Domain and Hosting… And More!
Understanding Web Management: What You Need to Know BEFORE You Create a Website
Research & Register a Domain Name
As I covered the first two articles, a domain name is the front facing business name of your website. It’s important to pick one that is both memorable but also related to your business. You could also consider a domain name that is SEO keyword-focused like NameofServiceNameofCity.com. As far as which domain registrar to choose from, there are plenty of reputable brands that offer very similar price points. GoDaddy, Google Domains, and Namecheap are three popular choices for a domain registrar – no need to make it an overly complicated process.
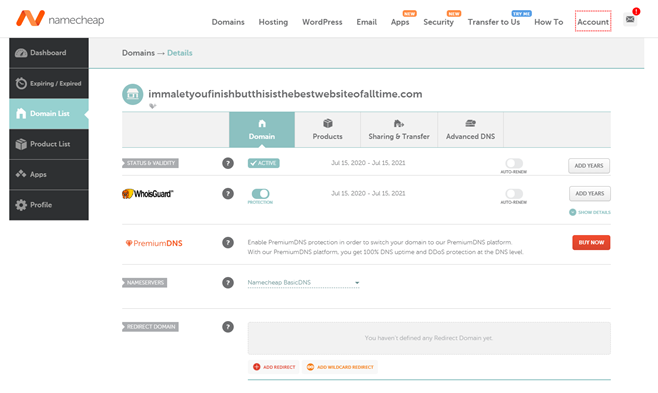
As for price, you should be able to find a fitting domain for $10-$12 (if not lower). You can of course get something more mainstream like movietheater.com, but it’s most likely taken, and it’ll get pretty expensive to pry away from someone. Once you purchase your domain name, you will have access to your domain name dashboard, which will look like this (this is a Namecheap dashboard).
Research & Select a Web Hosting Package
Next, you’ll select a web hosting package for your website. Similar to domain registrars, there are plenty of reputable brands (many brands do both domains and web hosting). The difference from selecting a domain registrar is that you will find a wide range of choices from web host brand to web host brand during this selection process.
I suggest you refer back to the terms we covered in the Understand Web Management (link) article. You want to look at uptime, bandwidth, Linux or Windows, is it compatible with the control panel you want, etc. You also want to look at price. I’d refer back to the difference between shared, VPS and dedicated hosting to help determine which price point to settle one. You could go anywhere from $3-$100+ a month depending how complex and large of a website it is. So, a pretty wide range.
Once you have your web hosting package and domain name, you should get a Welcome Email with directions on how to log in to your control panel. You can check out this article from HostGator, which details how to log into your cPanel (a control panel). The process will be similar for other web hosts and control panels.
Do I need SSL?
The next item of consideration in the creating a website process is if you should buy an SSL certificate or not. In the previous article, I covered the difference between HTTP and HTTPS. Touching on that a bit more, what the SSL certificate does (besides changing your URL from HTTP to HTTPS) is encrypt the communications between the client and the server. This means data that’s in transit, such as a password, phone number or even simply the pages you viewed, a hacker can not intercept that data and use it against you in a cyberattack.
So yeah, it’s pretty important to have an SSL certificate. This security is also reflected in the messaging in your URL. By getting an SSL certificate, your URL will get the coveted padlock icon instead of reading “not secure.” Not to mention it gives you a small SEO boost as well. It’s a no brainer to buy an SSL certificate and there are plenty of reputable brands that offers SSL certificates for as low as $15 a year (a steal!).
Edit Your DNS Record
So, now you got your domain name, web host, you have access to your control panel and domain name dashboard, and your SSL certificate! All the players are here and now it’s time to put it together. Going back to what we discussed about DNS in our previous article, it’s time to put all those terms you learned to use.
In the context of a web server, you are always going to have at least one A Record that maps the domain name to the public IP address of the server. So, you will need to go into your domain name dashboard and update the nameservers on the domain to point to the web host. It’s a pretty simple process. I am going to walk you through what I did in a Namecheap dashboard. The process will be similar for most domain registrar dashboards.
- Go to your domain registrar
- The click on “Manage” by your domain name
- Then, you need to set your name servers. You can use the name servers provided by your web host or use custom name servers. If you are going for a simple website, I recommend setting your domain to use your web host’s name servers.
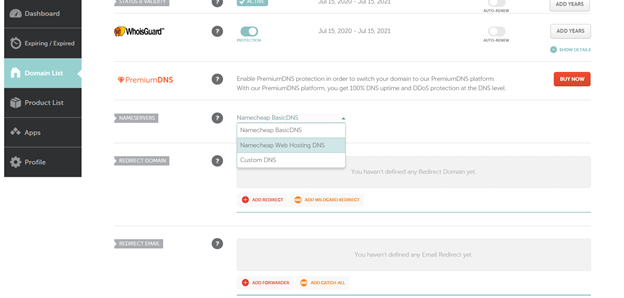
4. And you’re done!
The Language of a Web Page
While it’s simple to set up your website in a content management system like WordPress (which I’ll cover later), it’s important to have an idea of how web pages are structured. Now, I am not going to teach you HTML, CSS and the other languages of the web all right here, but you should know what they are and what they do.
Basically, a web page is made up of code, i.e. programming/scripting languages. At the most basic level, you could create a text file using a program like Notepad++ and then upload the website files (featuring your code) to your web host web server (we’ll cover uploading website files in the next section). This is the process you’ll take IF you are coding your own web pages for your website. As I said, that is not the route we are taking here but here are a few programing/scripting languages you need to AT LEAST know about if you are going to be a web admin.
- HTML – It’s a markup language that is utilized to construct a web page. It sort of sets the rules/code structure for how you can build and organize a web page. The main content of your webpage is in HTML.
- CSS – It’s is a design language. This language is used to style HTML elements, such as changing the font and/or color of written text/background/etc.
- JavaScript – It’s a client-side scripting language that allows you to add interactive elements to your webpage/website IE a form or personality quiz.
- PHP – PHP is another form of scripting language. PHP can also add interactive functionalities like JavaScript, but it’s more dynamic/advanced than JavaScript. You can use PHP to code web content but also data output. It can be used to create dynamic content, do cookies management, and MUCH more.
Just so you have an idea of what this would look like once it’s put together in a file. Here is a very basic example:
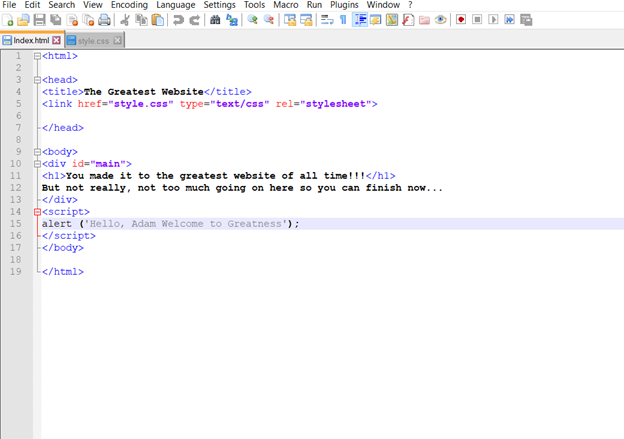
A few key items to take note of in the screenshots above:
- This a text file created in Notepad++, which is free to download and install.
- The first screenshot is mainly HTML and it’s a .html file.
- Tags, such as <html> then </html> are opening and closing tags (they tell the web page where a code begins and ends).
- As you see, there can be tags within tags, which is a way to further tell the web server what do with a section of the web page.
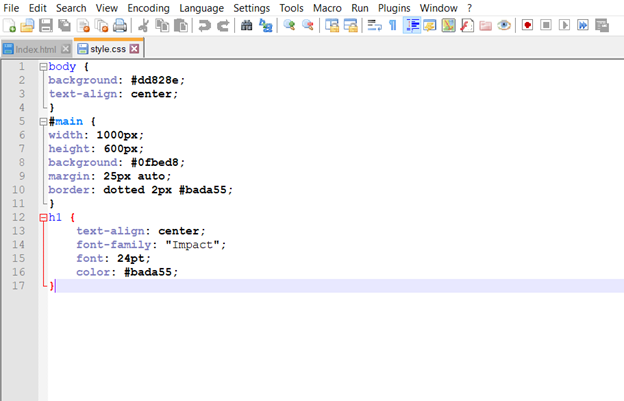
- The 2nd screenshot is a .css file. So, that file is telling the HTML file how to style and color the content.
I know this is all pretty out there stuff if you’re not familiar with it, but this should give you a bit more appreciation and understanding of what goes on behind the web page. While WordPress is very user friendly, you may run into some moments where you’ll want to alter the HTML of a page and this is a good starting point to get your feet wet.
What is FTP and Why Do I Need to Know About It?
Your control panel typically allows you to upload files to your web server, but there is another way to do it – using FTP (file transfer protocol). Using FTP is a better option, because it is a faster process, you can upload more files at once and you can have the upload running in the background while you are doing other things on cPanel (i.e. better for multitasking). You’ll only need to use FTP for adding content if you’re coding web pages and uploading them yourself (which we’ll dig into in a future installment in the series).
Putting Your Website Together (The WordPress Way)
Now you have a solid understanding of how the internet works, learned some key web management terms and the workings of a website, and have all of the components to create a website – it’s time actually do it. For this part, I am going to focus on building a WordPress website. Here are the general steps to getting your website setup. We are using cPanel as our control panel for these directions (there are many ways to do this and control panels will vary in steps, but this will give you a good idea on what to do).
- Download WordPress CMS from wordpress.org.
- Go to your File Manager in your control panel.
- Upload your newly downloaded WordPress Zip File to your public_html folder in your control panel/file manager

4. Extract WordPress files from the WordPress Zip Folder
5. Create a database in MySQL Databases section in your control panel
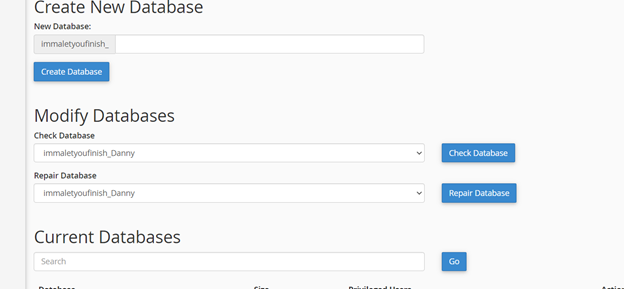
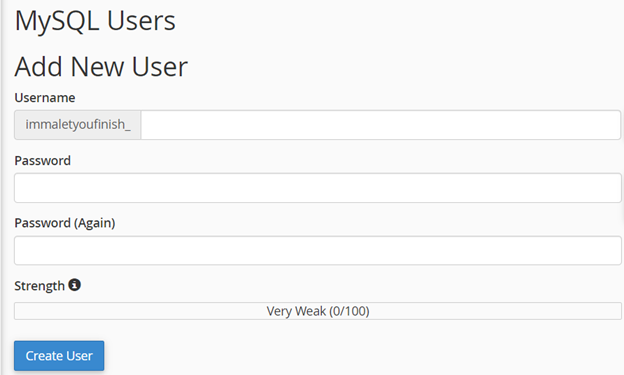
6. Create a database user in the same section
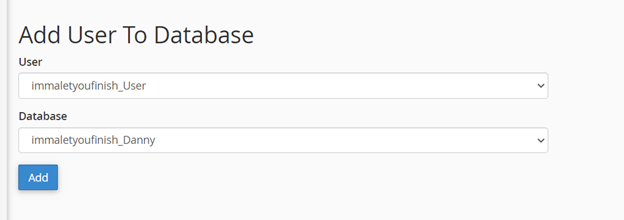
7. Add your new database user to your new database
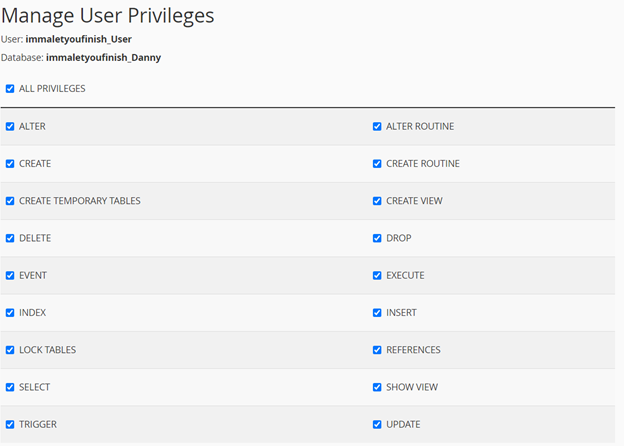
8. Give the new user permission to access the database (check the “All Privileges” box)
9. Go back to File Manager
10. Rename wp-config-sample.php to wp-config.php
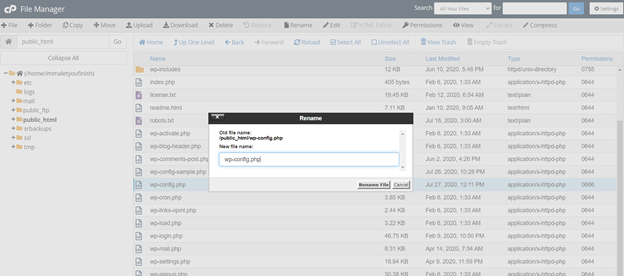
11. Right click and select “Edit” on your newly named wp-config.php folder
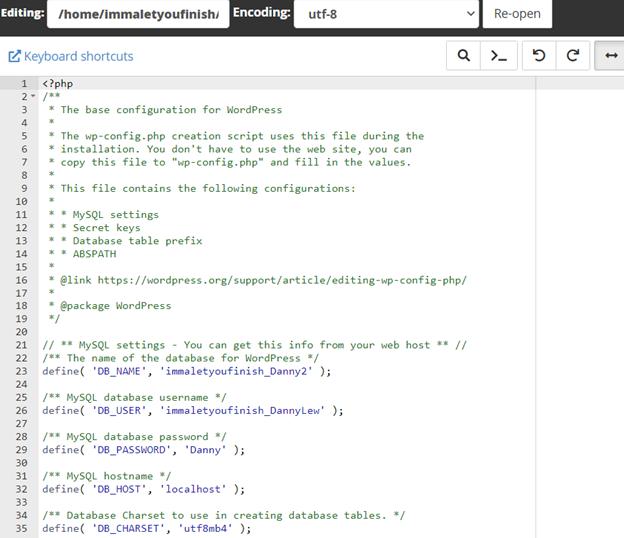
12. Fill the database name, database password and database username in the appropriate fields (highlighted in the blue in the screenshot below)
13. Go to your website (type your domain name into the browser) and follow the directions (selecting your language, username, PW, ect.) to finalize the installation.
14. Once you’re in your WordPress backend, there is a lot you can do. An easy way to start is by picking and activating a theme. A theme is a preset template that makes your website look good and easy to add content.
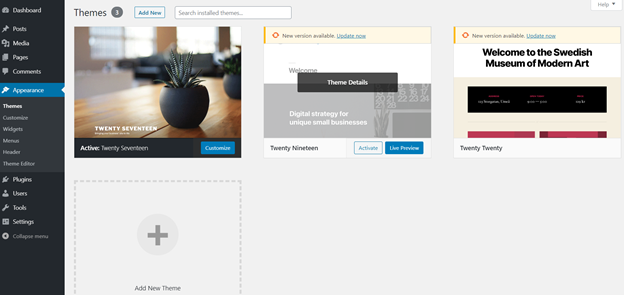
15. Now you can customize, which is very easy. You just click customize and you can easily make changes to your site.
I suggest digging for more info on how to build your WordPress website’s content – there is a lot of great insight out there.
Conclusion
We’ve looked at the Internet as a virtual city, we’ve learned many basic components of the web and website management, and now you have the tools to make a website. This is only one way to do go through the creating a website process. There are so many alterations you can make and purposes you can fulfill with a website – it’s just up to you to take it there. I’ll be back with deeper dives into the world of the web and websites. Until next time!


